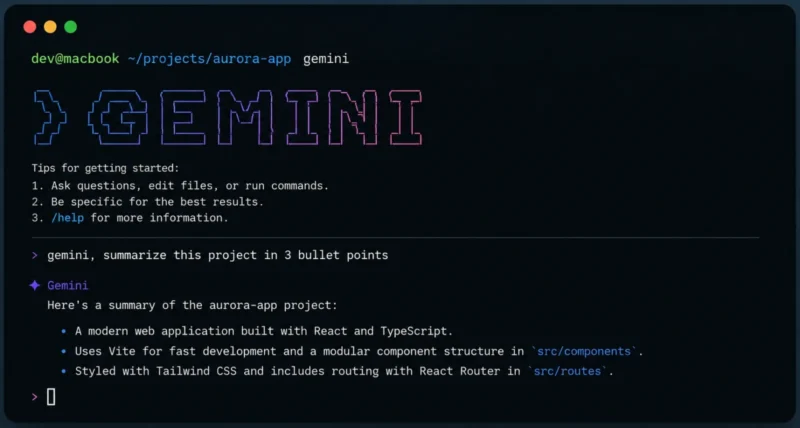
Read this first (June 2026): Google is retiring the free Gemini CLI on June 18, 2026. After that date, free, Google AI Pro, and Ultra accounts stop getting responses from the gemini command. The replacement is Antigravity CLI (the agy binary). This guide still teaches the tool end to end, because the workflow concepts carry straight over. Section 9 covers your exact migration path, and the Claude Code alternative if you want to switch instead.
You type a request in plain English. The agent reads your codebase, writes the fix, runs the tests, and shows you the diff before touching anything. That is Gemini CLI, and the free tier gives you 1,000 of those requests per day with a 1 million token context window. No credit card.
This guide takes you from a blank terminal to a working agent fixing real bugs. Install, authenticate, first commands, project memory with GEMINI.md, connecting external tools with MCP, and an honest comparison with Claude Code. Every command is copy-paste ready.
Quick answer: Run npm install -g @google/gemini-cli on Node.js 20 or higher, type gemini, and sign in with your Google account. You get 60 requests per minute and 1,000 per day on Gemini 2.5 Pro, free. Heads up: free access ends June 18, 2026 (see the banner above).
1. Why Developers Actually Use Gemini CLI
Three things make people pick Gemini CLI over the alternatives.
- It is free, and the free tier is generous. 1,000 requests a day covers a real workday of agentic coding. Claude Code and Codex CLI both bill per token or require a paid plan to do serious work.
- The context window is huge. 1 million tokens means the agent can hold most of a mid-sized repo in memory at once. You spend less time manually pointing it at files.
- Google Search is built in. The agent can ground its answers in live search results, which helps when you are working with a library that changed last week.
The honest tradeoff: on hard multi-file refactors, Gemini 2.5 Pro trails Claude Opus on first-pass correctness by a noticeable margin. For free exploration and long-context reads, it is the best value on the market. For mission-critical refactors, you may still reach for Claude Code. Section 8 breaks this down.

2. What You Need Before You Install
The list is short. You need two things.
Node.js 20 or Higher
Gemini CLI ships as an npm package, so you need Node.js version 20 or newer. Check your version first:
node –version
If the command prints v20 or higher, you are set. If it prints something lower, or the command is not found, install the latest LTS from nodejs.org. On macOS you can also use Homebrew (brew install node). On Linux, nvm is the cleanest way to manage Node versions.
A Google Account
For the free tier, a personal Google account is all you need. You sign in through your browser the first time you run the tool. For automation or CI pipelines, you use an API key instead (covered in Section 4).
3. Install Gemini CLI (60 Seconds)
One command installs the tool globally and makes the gemini command available from any folder.
npm install -g @google/gemini-cli
The install pulls down the package and its dependencies. It usually finishes in under a minute. Confirm it worked by checking the version:
gemini --version
Prefer not to install globally? Run it once with npx instead: npx https://github.com/google-gemini/gemini-cli. This is handy for a one-off task on a machine you do not own.
Two other install paths: On Google Cloud, Gemini CLI comes pre-installed in Cloud Shell. Just open Cloud Shell and type gemini. You can also grab a standalone binary from the GitHub releases page if you do not want Node.js on your machine at all.
4. Authenticate: Google Account or API Key
Run the tool for the first time and it walks you through sign-in.
gemini
A browser window opens. Sign in with your Google account and approve access. The tool saves your token locally, so you only do this once. From then on, gemini launches straight into an interactive session.
When to Use an API Key Instead
The Google account login is right for everyday interactive coding. For scripts, CI jobs, or any automation that cannot open a browser, use an API key. Generate one from Google AI Studio, then set it as an environment variable:
export GEMINI_API_KEY="your-key-here"
# Now gemini uses the key, no browser needed
gemini -p "Summarize the README in this folder"
One important catch the official npm documentation spells out: the Gemini API free tier gives you only 100 requests per day, not the 1,000 you get from the Google account login. For heavier automation you upgrade the API project to a paid plan, which unlocks higher rate limits. Get your key from aistudio.google.com/apikey. Keep it out of your code. Store it in your shell profile or a secrets manager, never in a committed file or pasted inline on the command line (it lands in your shell history).
5. Your First Real Commands
Open a terminal, move into a project folder, and start a session.
cd your-project
gemini
You are now in an interactive prompt. The agent can see the files in this folder. Try these, one at a time, to feel out what it does.
Understand a Codebase
Drop into an unfamiliar repo and ask:
> Explain what this project does and list the main entry points
The agent reads the files, traces the structure, and gives you a plain-English summary. This alone saves an hour on any new codebase.
Fix a Bug
Describe the problem in normal language:
> The login form throws a 500 when email is empty. Find and fix it.
Gemini CLI locates the relevant file, proposes an edit, and shows you the diff. Nothing changes on disk until you approve it. You stay in control of every write.
Run One-Shot Commands
You do not have to enter interactive mode. Pass a prompt directly with the positional argument for quick tasks:
gemini "Write a .gitignore for a Node and React project"
# Pipe a file in and ask about it
cat server.js | gemini "Find the security issues in this file"

6. Give the Agent Memory With GEMINI.md
Out of the box, the agent forgets your preferences every session. A GEMINI.md file fixes that. Drop one in your project root and Gemini CLI reads it automatically every time you run the tool in that folder.
Think of it as a standing brief. Coding standards, tech stack, things the agent should never do. Create one like this:
# Create a project-level brief
cat > GEMINI.md << 'EOF'
## Project context
This is a TypeScript and React app using Vite.
## Rules
- Use functional components and hooks, never class components
- Write tests with Vitest for every new function
– Never commit directly to main
- Match the existing Prettier config
EOF
Now every request in that folder inherits these rules. You stop repeating yourself. The agent stops suggesting class components you do not want. A global version lives at the home-directory level for preferences that apply everywhere:
~/.gemini/GEMINI.md
Why this is the highest-leverage step: Most people skip GEMINI.md and then complain the agent ignores their conventions. Five minutes writing this file is the difference between an agent that fits your project and one that fights it. Treat it as the first thing you create in any repo.
7. Connect External Tools With MCP
MCP, the Model Context Protocol, lets the agent reach beyond your files. With MCP servers configured, Gemini CLI can query your GitHub issues, search a database, hit an API, or pull from Google Search, all inside the same session.
MCP servers live in your settings file. Open or create it here:
~/.gemini/settings.json
Add an mcpServers block. This example wires up a GitHub server so the agent can read your repositories and pull requests:
{
"mcpServers": {
"github": {
"command": "npx",
"args": ["-y", "@modelcontextprotocol/server-github"],
"env": {
"GITHUB_TOKEN": "your-github-token"
}
}
}
}
Restart the session and the agent can now act on GitHub. You reference a server inline with the @ symbol:
> @github List my open pull requests and summarize each one
This is what turns Gemini CLI from a smart autocomplete into a real agent. You can manage servers from the command line too with gemini mcp. Hundreds of community MCP servers exist for Slack, Postgres, Jira, and more.
8. Gemini CLI vs Claude Code: Which Should You Use?
This is the comparison everyone asks about. Both run in your terminal. Both read your project, plan, edit, and run commands with your approval. The difference comes down to model strength, price, and context size.
| Factor | Gemini CLI | Claude Code |
| Free tier | Yes, 1,000 requests/day (until June 18, 2026) | No free tier for real work |
| Default model | Gemini 2.5 Pro | Claude Opus / Sonnet |
| Context window | 1 million tokens | Large, model-dependent |
| Hard refactor accuracy | Good, trails Claude on SWE-bench | Stronger first-pass correctness |
| Search grounding | Built in (Google Search) | Via tools / MCP |
| Open source | Yes (Apache 2.0) | No |
| Best for | Free exploration, long-context reads | Hard multi-file refactors, accuracy |
The simple rule: start with Gemini CLI if you want to learn agentic coding for free and read large codebases. Reach for Claude Code when first-pass accuracy on a complex refactor matters more than cost. Many developers run both and pick per task.
New to the terminal-agent idea entirely? Our beginner guide to Claude Code walks through the same workflow with a different engine, so you can compare the feel side by side.
9. The June 18 Shutdown: Your Migration Plan
Google announced at I/O 2026 that the free Gemini CLI is being replaced by Antigravity CLI. The official transition notice on the Google Developers Blog sets a hard date. The Register and TechTimes both reported the move, noting Google accepted over 6,000 community contributions to the open-source tool before closing the successor’s source. Here is what actually changes and what you should do.
| Your situation | What happens June 18, 2026 | What to do |
| Free Google account | gemini stops responding | Move to Antigravity CLI or Claude Code |
| Google AI Pro / Ultra | gemini stops responding | Move to Antigravity CLI |
| Code Assist Standard / Enterprise | No change, keeps working | Nothing required |
| Paid Gemini API key | Keeps working | Nothing required |
Option A: Move to Antigravity CLI
Antigravity CLI is Google’s official successor. It uses a new binary called agy, is built in Go for speed, and adds asynchronous multi-agent workflows. It keeps the features that mattered most: Agent Skills, Hooks, Subagents, and Extensions (now called plugins). Your GEMINI.md knowledge maps over closely.
Download it from antigravity.google/download. One caveat worth knowing: unlike Gemini CLI, Antigravity CLI launched closed-source, which drew real pushback from the open-source community. If that matters to you, weigh Option B.
Option B: Switch to Claude Code or Codex CLI
If you would rather not follow Google’s migration, this is a clean moment to switch terminal agents entirely. Claude Code offers stronger first-pass accuracy on hard refactors. Both Claude Code and OpenAI’s Codex CLI use the same approve-the-diff workflow you already know from Gemini CLI, so the muscle memory transfers.
Option C: Keep Gemini CLI on a Paid API Key
Want to keep the exact tool? A paid Gemini API key keeps gemini working past the deadline. You pay per token instead of using the free Google account login. Set GEMINI_API_KEY as shown in Section 4 and the command keeps responding.
Bottom line: If you just want a free terminal agent and do not care which logo is on it, Antigravity CLI is the path of least resistance. Developers who prioritize accuracy on tough refactors should treat this as a good moment to try Claude Code. Anyone with automation built on Gemini CLI can keep everything running on a paid API key while planning a longer-term move.
Frequently Asked Questions
Is Gemini CLI free?
Yes, with a personal Google account you get 60 requests per minute and 1,000 per day on Gemini 2.5 Pro, plus a 1 million token context window, at no cost. Important: this free access ends June 18, 2026, when Google moves individual users to Antigravity CLI. Enterprise Code Assist licenses and paid API keys keep working past that date.
How do I install Gemini CLI?
Install Node.js 20 or higher, then run npm install -g @google/gemini-cli in your terminal. Type gemini to start, and sign in with your Google account in the browser. The whole process takes about a minute. On Google Cloud, it comes pre-installed in Cloud Shell.
What is the difference between Gemini CLI and Gemini Code Assist?
Gemini CLI runs in your terminal as a standalone agent. Gemini Code Assist is the IDE integration (the VS Code extension and chat) that shares the same underlying technology. Code Assist agent mode in VS Code is actually powered by Gemini CLI. Both are affected by the June 18, 2026 transition for individual users.
Gemini CLI vs Claude Code: which is better?
Gemini CLI wins on price (free tier) and context size (1 million tokens). Claude Code wins on first-pass accuracy for hard multi-file refactors. If you are learning or working with large codebases on a budget, start with Gemini CLI. If you need maximum reliability on complex changes, Claude Code is stronger. Many developers use both.
What is GEMINI.md and do I need it?
GEMINI.md is a context file you place in your project root. Gemini CLI reads it automatically and applies your coding standards, tech stack details, and rules to every request in that folder. You do not strictly need it, but it is the single highest-leverage step for getting consistent results. Five minutes writing it saves hours of correcting the agent.
Can Gemini CLI run shell commands on its own?
Yes, in agent mode it can run commands like git, npm, and more. The key safety feature: it always shows you the exact command and asks for permission before running it. Nothing executes without your approval, so you stay in control of your system at every step.
What is replacing Gemini CLI?
Antigravity CLI, announced at Google I/O 2026, replaces Gemini CLI for individual users on June 18, 2026. It uses the agy binary, is built in Go, and adds asynchronous multi-agent workflows. It keeps Agent Skills, Hooks, Subagents, and Extensions. You download it from the Antigravity website. Note that it launched closed-source, unlike the open-source Gemini CLI.
Will my Gemini CLI scripts break on June 18?
If your scripts use a free Google account login, yes, they stop working on June 18, 2026. To keep automation running, either switch to a paid Gemini API key (set GEMINI_API_KEY) or migrate the scripts to Antigravity CLI. Enterprise Code Assist license holders are not affected. Start testing your migration now rather than the week of the deadline.
Does Gemini CLI work offline?
No. Gemini CLI sends your prompts and relevant file context to Google’s servers to run the Gemini model, so it needs an internet connection. The model does not run locally on your machine. If you need fully offline AI coding, you would look at locally hosted open-weight models instead.